Sending Your First Message
Before you can send messages through the WapFlow API, you need to have at least one connected phone number in your account. If you haven't added and connected a phone number yet, please follow the guide on How to Connect Your First Phone Number before proceeding.
Prerequisites
Before sending your first message, make sure you have:
- A WapFlow account with at least one connected phone number
- Your device token (used for API authentication)
- Node.js installed on your system (for this example)
Getting Your Device Token
Your device token is required for authenticating API requests. Here's how to get it:
- Log in to your WapFlow dashboard
- Select the phone number you want to use for sending messages
- Click on the Overview tab
- In the Device Token section, you'll see your unique device token
- Click the Copy button to copy the token to your clipboard
Important: Keep your device token secure and treat it like a password. Never share it publicly or commit it to version control.
The device token will be used in the Authorization header of all your API requests as a Bearer token.
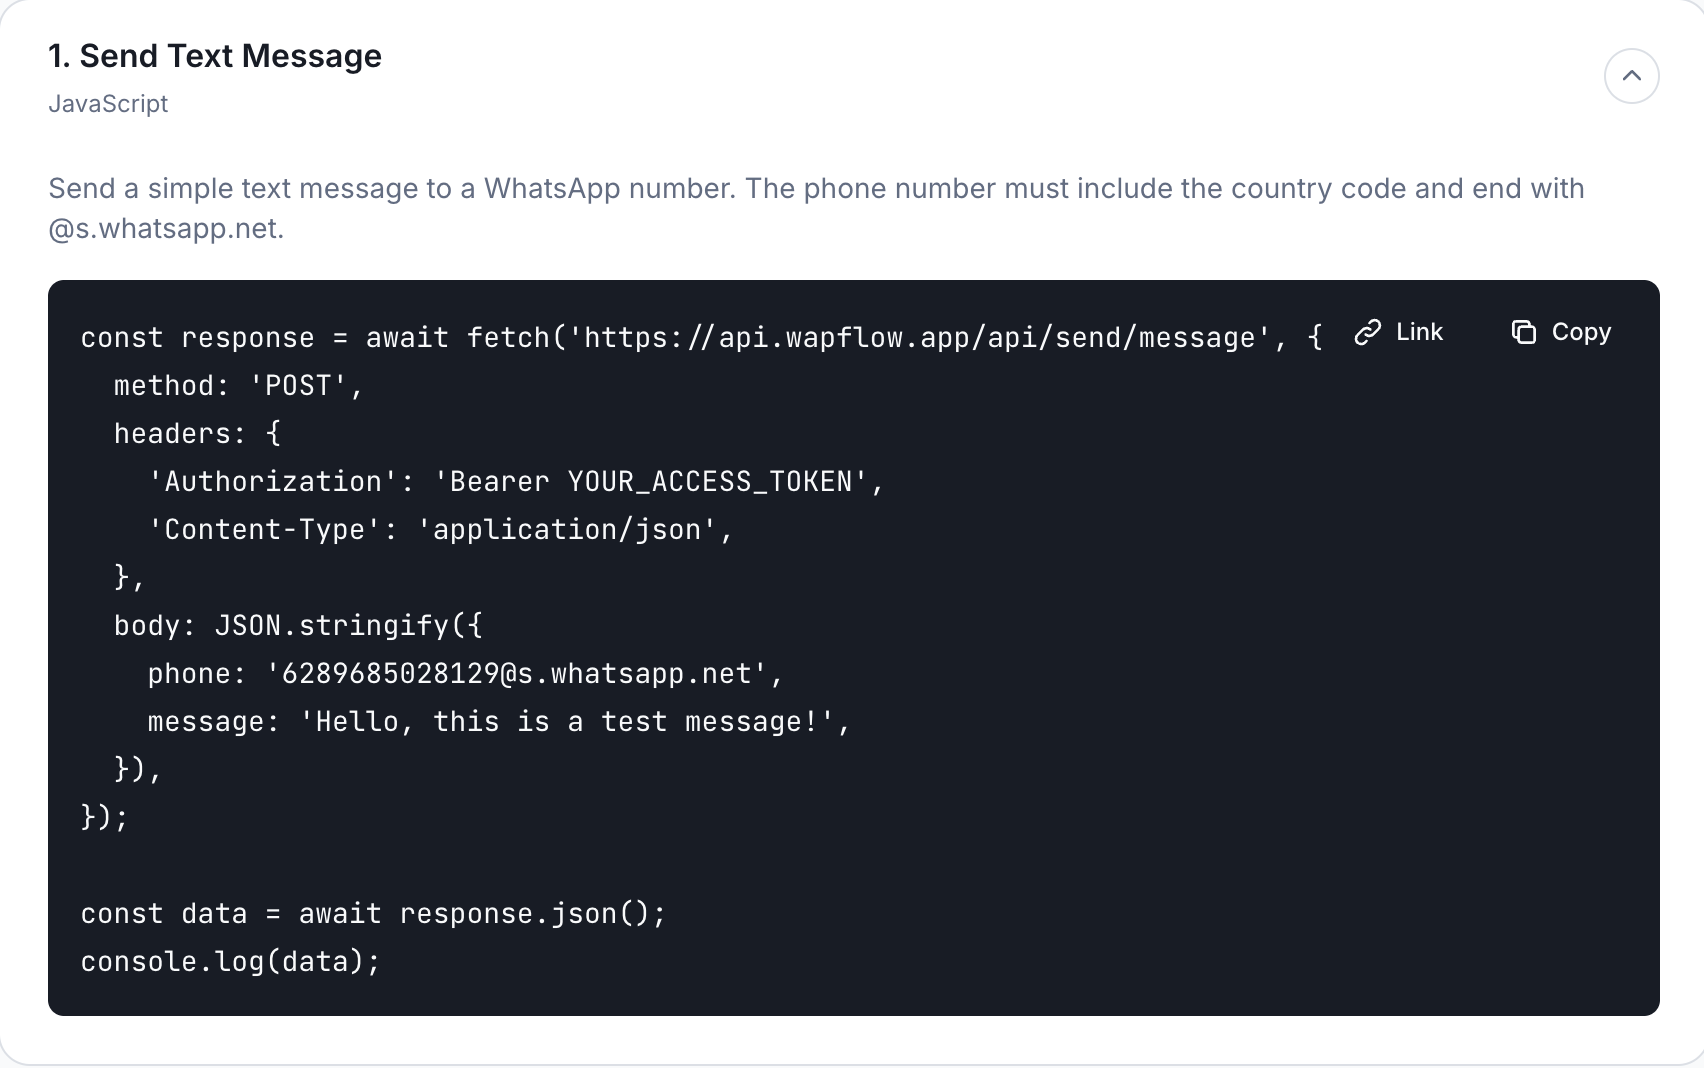
Sending Your First Message
Now that you have your device token, let's send your first message. Here's a complete example:
// Send a WhatsApp message using the WapFlow API
const response = await fetch('https://api.wapflow.app/api/send/message', {
  method: 'POST',
  headers: {
    // Replace YOUR_DEVICE_TOKEN with your actual device token from the Overview tab
    'Authorization': 'Bearer YOUR_DEVICE_TOKEN',
    'Content-Type': 'application/json',
  },
  body: JSON.stringify({
    // Replace with recipient's phone number (country code + @s.whatsapp.net)
    // Example: '254712345678@s.whatsapp.net'
    phone: '1234567890@s.whatsapp.net',
    // Replace with your message text
    message: 'Hello, this is a test message!',
  }),
});// Parse and display the response
const data = await response.json();
console.log(data);
Step 1: Update the Variables
Before running the code, replace these values:
- YOUR_DEVICE_TOKEN: Replace with the device token you copied from the Overview tab
- '1234567890@s.whatsapp.net': Replace with the recipient's phone number (include country code, no + sign, and append
@s.whatsapp.net, e.g.,254712345678@s.whatsapp.net) - 'Hello, this is a test message!': Replace with your desired message text
Understanding the Code
Let's break down what each part of the code does:
1. API Request Setup
The code uses the fetch API to make an HTTP POST request to the WapFlow message endpoint:
const response = await fetch('https://api.wapflow.app/api/send/message', {
  method: 'POST',
  // ... rest of the request
});
2. Authentication Header
Your device token is sent in the Authorization header using the Bearer token format:
headers: {
  'Authorization': 'Bearer YOUR_DEVICE_TOKEN',
  'Content-Type': 'application/json',
}
Important: Replace YOUR_DEVICE_TOKEN with your actual device token from the Overview tab in your dashboard.
3. Request Body
The message data is sent as JSON in the request body:
body: JSON.stringify({
  phone: '1234567890@s.whatsapp.net',  // Recipient's WhatsApp number
  message: 'Hello, this is a test message!',  // Your message text
})
- phone: The recipient's phone number must include the country code (no + sign) and end with
@s.whatsapp.net - message: The text content you want to send
4. Handling the Response
After the request is sent, the response is parsed as JSON:
const data = await response.json();
console.log(data);
On success, the API returns a response object containing message details such as message ID, status, and timestamp.
Need Help?
If you encounter any issues sending messages, contact us via Email: info@wapflow.app or Chat With Us.